


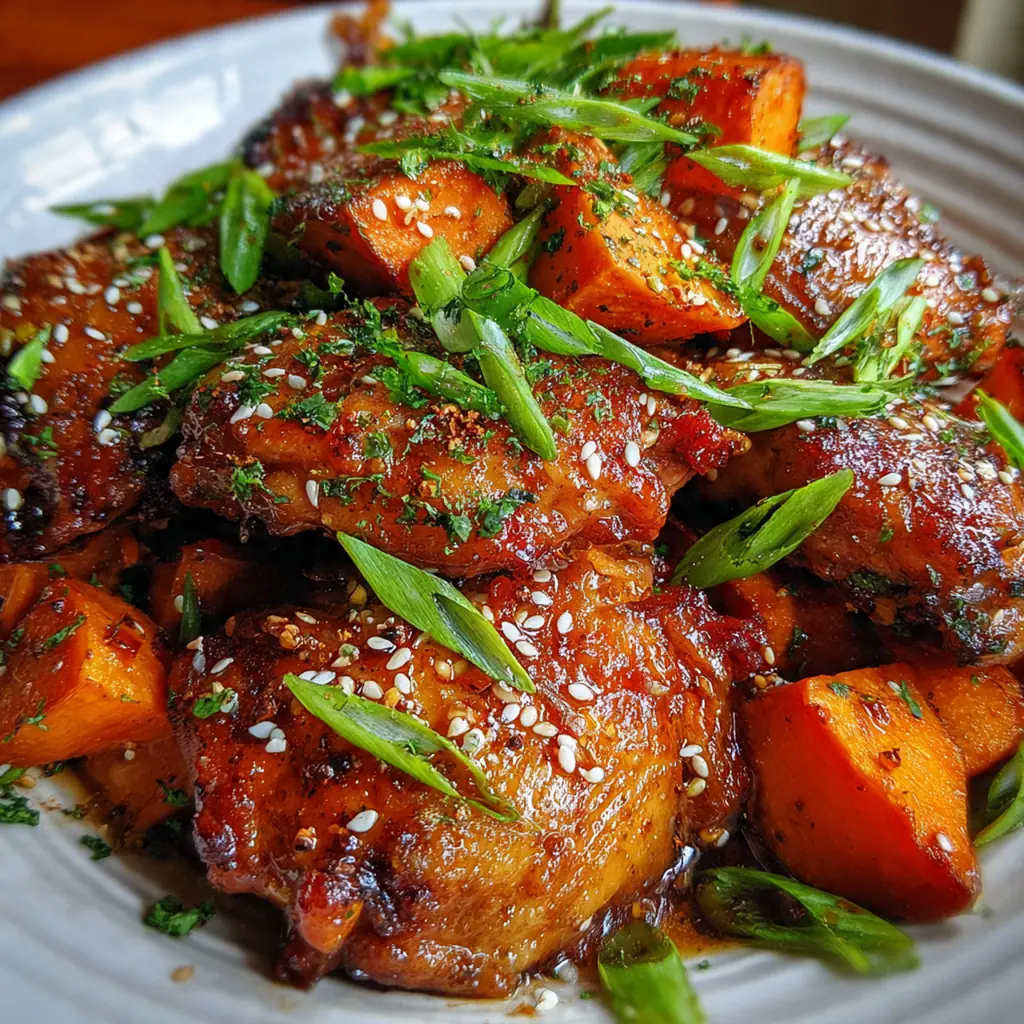
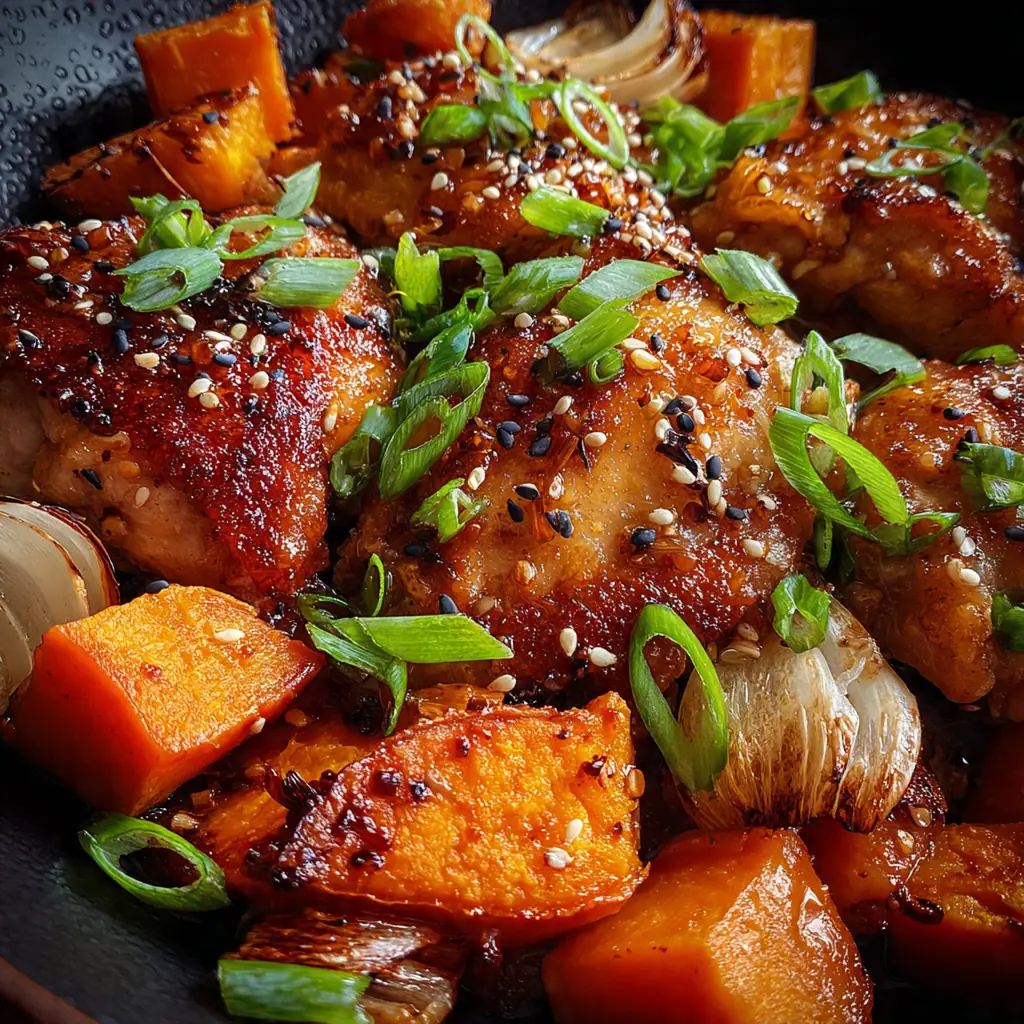
This one-pan honey garlic chicken sweet potatoes bake is my go-to for busy weeknights when I crave a meal that’s both comforting and impressive. It’s an Asian-inspired dish that brings together sticky, sweet chicken and caramelized sweet potatoes with minimal cleanup. The honey garlic glaze becomes irresistibly glossy, coating every bite with savory depth. You’ll find the whole process straightforward, and the result is a complete meal that always earns compliments from family and friends.
Why You'll Love This Recipe
- A complete balanced meal cooks together on one pan for easy cleanup
- The honey garlic sauce is a perfect sticky sweet and savory blend with ginger
- Prep is straightforward using mostly pantry staples you already own
- It’s a family-friendly recipe that feels special enough for any dinner guest
- My kids always ask for seconds when I make this
Ingredients You’ll Need
- Boneless skinless chicken thighs: They stay incredibly juicy and tender during roasting, which is why I prefer them over breasts for this dish. Look for ones with the fat trimmed for a cleaner result.
- Sweet potatoes: Their natural sweetness caramelizes beautifully in the oven, creating a perfect contrast to the savory glaze. Choose firm potatoes without soft spots for the best texture.
- Olive oil: Helps the potatoes get crispy edges and prevents the chicken from sticking. A good extra virgin olive oil adds a hint of fruitiness.
- Salt and black pepper: These basic seasonings build the foundational flavor for both the chicken and the vegetables. I use kosher salt for even distribution.
- Honey: It’s the base of that glossy, sticky sauce and provides a mellow sweetness. Raw honey adds a lovely floral note if you have it.
- Garlic: Fresh minced garlic gives the sauce its essential aromatic punch. Don’t be tempted to use pre-minced jarred garlic here.
- Soy sauce: Adds the essential salty, umami depth that balances the honey. For gluten-free, simply swap in tamari as noted.
- Rice vinegar: This brings a subtle tang that brightens the whole sauce and keeps it from being too cloying. It’s a key balancing ingredient.
- Fresh ginger: Grated ginger adds a warm, spicy note that makes the sauce taste complex and authentic. A microplane makes grating it easy.
- Cornstarch: It’s the secret to transforming the sauce from thin to a luxurious, clingy glaze that coats every piece perfectly.
- Water: Mixed with cornstarch to create a slurry that thickens the sauce without lumps. Just use cold tap water.
- Green onions: They add a fresh, crisp finish and a pop of color. Slice them thin just before serving for the best look.
- Sesame seeds: A sprinkle adds a nice toasty flavor and makes the finished dish look restaurant-worthy. I like using both white and black.
How to Make It
Preheat and Prep Your Pan:
Start by preheating your oven to 400°F and lining a large rimmed baking sheet with parchment paper. This guarantees easy cleanup later and ensures nothing sticks, so you can focus on the flavors.
Toss the Sweet Potatoes:
In a large bowl, toss your cubed sweet potatoes with one tablespoon of olive oil, half the salt, and half the pepper. Spreading them in a single layer on one half of the sheet gives them room to caramelize instead of steam.
Season and Sear the Chicken:
Pat your chicken thighs completely dry with paper towels, then season both sides with the remaining salt and pepper. Heating oil in a skillet and searing them for a few minutes per side builds a golden crust that adds incredible texture and locks in juices before baking.
Whisk Together the Glaze:
While the chicken sears, whisk the honey, minced garlic, soy sauce, rice vinegar, and grated ginger in a small bowl. This quick step creates the flavor powerhouse for the entire dish, so make sure it’s well combined.
Thicken the Sauce:
Pour the honey garlic mixture into the same skillet you used for the chicken and bring it to a gentle simmer. Whisk the cornstarch and water into a slurry, then stir it into the simmering sauce until it thickens into a glossy glaze, which takes just a minute or two.
Assemble and Bake:
Transfer the seared chicken to the empty half of the baking sheet next to the sweet potatoes. Brush about half of the thickened sauce over the chicken, then slide the whole pan into the oven. Bake until the chicken is cooked through and the potatoes are fork-tender.
Finish and Rest:
Once out of the oven, immediately brush the chicken with the rest of that glorious sauce. Sprinkle everything with the sliced green onions and sesame seeds for freshness and crunch. Letting it rest for five minutes allows the juices to settle back into the chicken.
You Must Know
- Chicken thighs stay juicier than breasts for this cooking method
- Don’t skip searing the chicken first for maximum flavor
- Cut sweet potato cubes to a similar size for even roasting
- The cornstarch slurry is non-negotiable for a sticky glaze
- I always make a double batch of the sauce because it’s that good
Storage Tips
Store any leftovers in an airtight container in the refrigerator, where they’ll stay good for three to four days. I find reheating them gently in a covered oven-safe dish at 350°F works better than the microwave to keep the chicken from drying out and the sweet potatoes from getting mushy. You can also flake the cold chicken over a salad for a fantastic next-day lunch—the flavors are even more developed after a night in the fridge.
Ingredient Substitutions
If you prefer chicken breasts, use them, but reduce the bake time by a few minutes to avoid dryness. Maple syrup or agave can stand in for honey in a pinch, though the flavor will be slightly different. Don’t have fresh ginger? A quarter teaspoon of ground ginger whisked into the sauce works. For a different vegetable, try cubed butternut squash or carrots, adjusting the roast time as needed. And if you’re out of green onions, a handful of chopped fresh cilantro or parsley adds that same fresh finish.
Serving Suggestions
I love serving this over a big bed of fluffy jasmine rice or quinoa to soak up every last drop of the extra sauce on the pan. For a fresh contrast, a simple side of steamed broccoli or a crisp cucumber salad with a sesame dressing works wonders. It’s a complete meal on its own, but adding a quick stir-fry of snap peas or bok choy makes it feel even more like a takeout feast at home.
Cultural Context
This dish is a fantastic example of modern, weeknight-friendly Asian-inspired cooking, taking cues from the sweet and savory glazes popular in many Chinese and Korean dishes. The technique of searing protein and then baking it with a starch is a Western convenience method, but the flavor profile—garlic, ginger, soy, and sesame—is deeply rooted in East Asian culinary traditions. It’s a beautiful fusion that respects the balance of flavors those cuisines are known for, while fitting seamlessly into a busy home cook’s routine. You’ll find similar sticky glazes on everything from Korean fried chicken to classic Chinese honey walnut shrimp.
Pro Tips
- Pat your chicken thighs very dry before seasoning for the best sear
- If your sauce thickens too much, just thin it with a splash of water
- For extra crispiness, broil for the final two minutes and watch closely
- Cube the sweet potatoes around one inch for the ideal tender texture
- I always grate my garlic and ginger fresh for the brightest flavor
Frequently Asked Questions
You can, but we recommend boneless, skinless chicken thighs for their juicy, forgiving texture during baking. If using breasts, cut them into smaller, uniform pieces and check for doneness a few minutes earlier to prevent dryness.
You can prep the components ahead! Cube the sweet potatoes and store them in water, and mix the glaze ingredients (except cornstarch/water). Assemble and bake just before serving for the best texture on your honey garlic chicken sweet potatoes.
For a gluten-free version, use tamari as suggested. Coconut aminos are a great soy-free, slightly sweeter alternative that still gives the salty, umami depth this honey garlic chicken sweet potatoes needs.
The chicken should reach an internal temperature of 165°F, and the sweet potatoes should be fork-tender and lightly caramelized at the edges, which takes about 25-30 minutes in a hot oven.
This is a complete one-pan meal! For a fuller spread, serve it with a simple side of steamed broccoli, jasmine rice to soak up extra glaze, or a quick cucumber salad for a fresh contrast.